前言
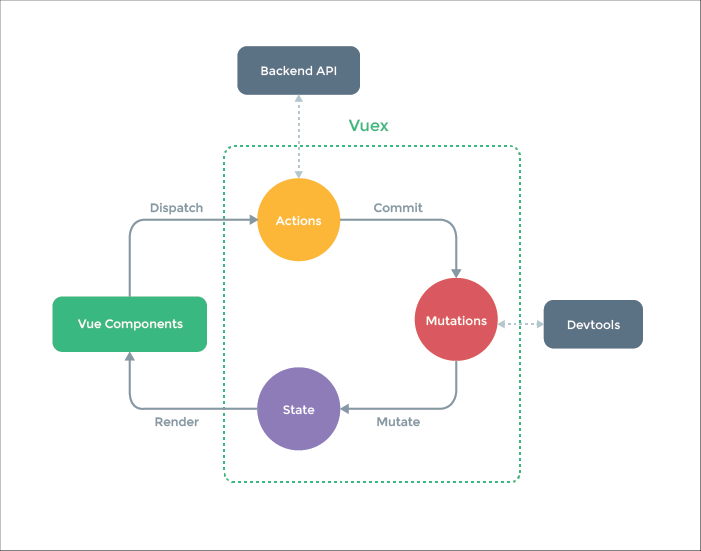
我项目中使用ws获取数据,因为数据是不断更新的,vue页面只更新一次就不更新了,然后暂时只能想到vuex来保存更新状态,页面监听数据实现实时更新。下面是我测试时用的数据,没有用ws,用的是定时器模拟定时发送数据。
1.项目引入vue
npm i vuex
2.main.js引入vuex
import { createApp } from 'vue'
import './style.css'
import App from './App.vue'
//vuex
import store from './store/index.js'
import * as echarts from 'echarts'
const app = createApp(App)
// 全局挂载echarts
createApp(App).config.globalProperties.$echarts = echarts
createApp(App).use(store).mount('#app')
3.新建store文件夹
index.js里写vuex
import { createStore } from 'vuex'

const store = createStore({
    state: {
        iotData: {},
        count: 0,
    },
    getters: {

        getStateCount: function (state) {
            console.log('想发火啊');
            return state.iotData;
        }
    },
    mutations: {
        addCount(state, payload) {
            state.count += payload
        },
        setIOTData(state, data) {
            state.iotData = data
            console.log('setIOTData方法', state.iotData);
        },
        updateIOTTagConfig(state, data) {
            //重点,要不然页面数据不更新
            state.iotData=null
            state.iotData = data
            console.log(state.iotData, '进入mutations');
        },
    },
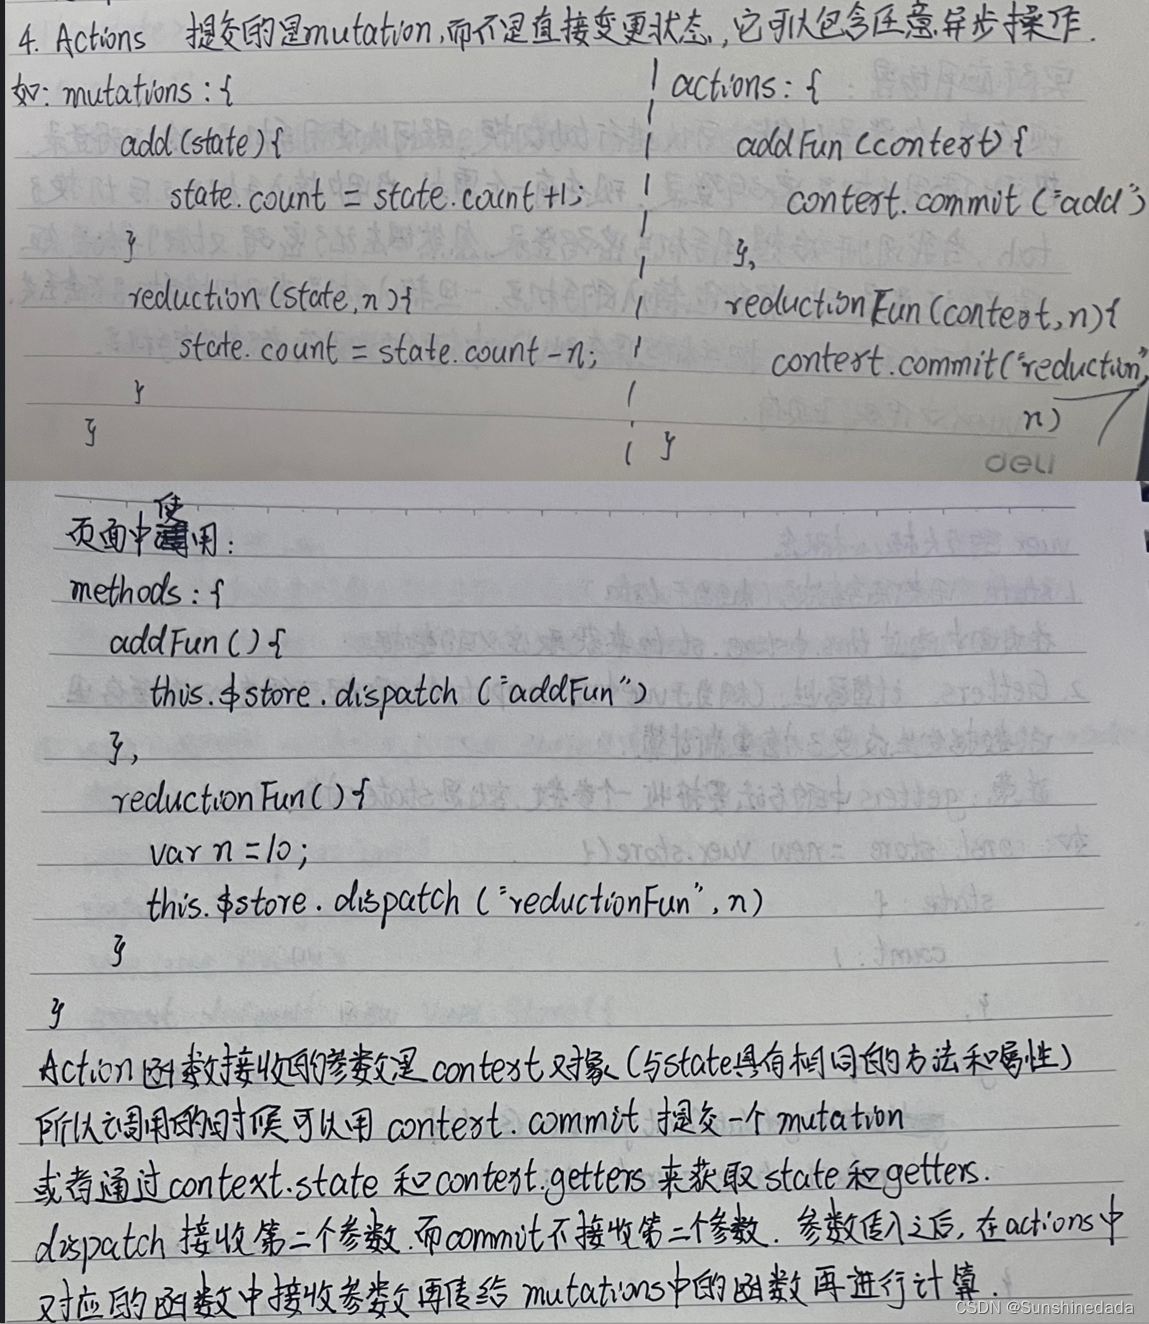
    actions: {
        asyncAddStoreCount(store, payload) { // 第一个参数是vuex固定的参数,不需要手动去传递
            store.commit("addCount", payload)
        },
        asyncupdateIOTTagConfig({ commit, state }, data) {
            commit('updateIOTTagConfig', data)
        },

    },
    modules: {

    }
})

export default store
3.在传输数据的页面引入vuex (api.js)
(注意,这里我用的是定时器,另外不要在意这么多方法传这个数组,你也可以就一个方法里使用vuex,我这个就是测试写的)
let timer
import  store  from "../store/index";
export function myStopEcharts() {
    clearTimeout(timer)
}
export function startEcharts() {

    timer = setInterval(() => {
        var ydata1 = []
        for (let i = 0; i < 1; i++) {
            ydata1.push({ 'id': Math.round(Math.random() * 20), 'serialNumber': 2001, 'time': 2022 })
        }
        jj(ydata1)

    }, 2000)
}
 function jj(ydata1) {
    const messageList = ydata1
    hh(messageList)
}
function hh(messageList) {
    runExit(messageList)

}
function runExit(message) {
    exit(message)
}
 var exitArr = []
function exit(data) {
       exitArr.push(...data)
    if (exitArr.length > 20) {
         exitArr.splice(0,17)
        // console.log(s,exitArr,'pos');
    }
    store.dispatch('asyncupdateIOTTagConfig',exitArr)
}
4.渲染页面
<template>
  {{name}}
  <!-- <h1>vuex中的数据{{ store.state.count }}</h1>
  <button @click="changeStoreCount">改变vuex数据</button>
  <button @click="asyncChangeStoreCount">异步改变vuex数据</button> -->
  <echarts></echarts>
</template>
<script>
import { defineComponent, computed,ref, watch, toRaw ,onUnmounted} from "vue";
import echarts from "./echarts.vue";
import { useStore } from "vuex";
import axios from "axios";
export default defineComponent({
  name: "HelloWorld",
  components:{echarts},
  setup() {
    let {state, commit,getters} = useStore();
    //使用计算属性动态拿到vuex的值
    let name = computed(() => {return state.iotData})
    // let UserInfoNoParams = computed(() => getters['getStateCount'])
    console.log(name,state.iotData,'哎');
    // commit("setIOTData", 1);
    // const nextAge = computed({
    //    get() {
    //     return store.iotData
    //   },
    //   // set(value) {
    //   //   console.log(value)  //  输出新修改的值
    //   //   return age.value = value - 1
    //   // }
    // })
    //监听数据
     watch(name, (newVal, oldVal) => {
      console.log(name,"改变的值", toRaw(newVal));
      console.log("旧",oldVal);
    },{immediate:true,deep: true});
    // console.log(nextAge,'nextAge');
    return {name};
    //   const changeStoreCount = () => {
    //     store.commit("addCount", 1)
    //   }
    //   const asyncChangeStoreCount = () => {
    //     setTimeout(() => {
    //  // asyncAddStoreCount是mutations中的方法,2是传递过去的数据
    //  // 异步改变vuex用dispatch方法,这里用setTimeout模拟异步操作
    //       store.dispatch("asyncAddStoreCount", 2)
    //     }, 1000)
    //   }
    // return { store, changeStoreCount, asyncChangeStoreCount }
  },
});
</script>
<style scoped></style>
代码可能有点乱,不过能实现效果。
总结
到此这篇关于vue3使用vuex实现页面实时更新数据(setup)的文章就介绍到这了,更多相关vuex页面实时更新数据内容请搜索阿兔在线工具以前的文章或继续浏览下面的相关文章希望大家以后多多支持阿兔在线工具!


