1. 搭建环境
1.生成工程文件
npm init
2.安装 express
npm i express --save
3.新增app1.js,开启服务器1 端口:3001
const express = require('express')
const app = express()
const port = 3001

// 设置`cookie`
app.get("/login", (req, res) => {
    res.cookie("JESSIONID", "10101001", { maxAge: 2000000, httpOnly: true });
    res.json({ code: 200, message: "登录成功" });
  });

// 检测浏览器是否会自动携带上`cookie`
app.get("/getUser", (req, res) => {
const user = req.headers.cookie.split("=")[1];
res.json({ code: 200, user });
});

// 静态资源在public目录下
app.use("/", express.static("public"));

app.listen(port, () => {
  console.log(`Example app listening on port ${port}`)
})
4.新增app2.js,开启服务器2 端口:3002
const express = require('express')
const app = express()
const port = 3002

app.get("/crossList", (req, res) => {
  res.json({ code: 200, msg: "这是3002端口返回的" });
});

app.listen(port, () => {
  console.log(`Example app listening on port ${port}`)
})
5.新增public文件夹,新建index.html文件
<!DOCTYPE html>
<html lang="en">
<head>
    <meta charset="UTF-8">
    <meta http-equiv="X-UA-Compatible" content="IE=edge">
    <meta name="viewport" content="width=device-width, initial-scale=1.0">
    <title>Document</title>
    <script src="https://unpkg.com/axios/dist/axios.min.js"></script>
</head>
<body>
    <div>
        <button id="button">同源请求</button>
        <button id="crossButton">跨域请求</button>
    </div>
    <script>
        const button = document.querySelector("#button");
        const crossButton = document.querySelector("#crossButton");

        axios.get("http://localhost:3001/login", {}).then((res) => {
          console.log(res);
        });
        // 发送同域请求
        button.onclick = function () {
          axios.get("http://localhost:3001/getUser", {}).then((res) => {
            console.log(res);
          });
        };
        // 发送跨域请求
        crossButton.onclick = function () {
          axios({
            method: "get",
            url: "http://localhost:3002/crossList",
          }).then((res) => {
            console.log(res);
          });
        };
      </script>

</body>
</html>
6.分别启动两个服务
- node app1.js
- node app2.js
7.项目目录如下

至此,环境搭建好了,在浏览器访问http://localhost:3001/index.html即可。

我们把资源部署到了服务器1上,即端口3001。同源请求的是3001的接口,跨域请求的是3002的接口。
2. 测试同源cookie
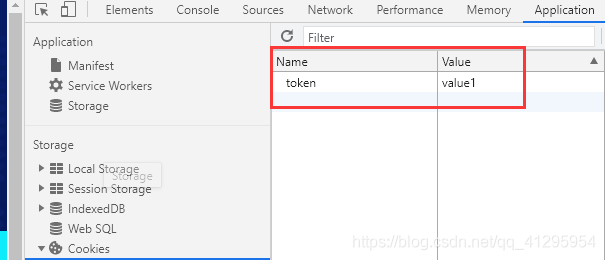
加载index.html会自动请求login接口,获取cookie


点击同源请求按钮,发送同源请求,getUser接口请求会自动携带cookie

3. 跨域请求携带cookie
点击跨域请求按钮

解决:
1.axios请求时加上 withCredentials: true,再次点击跨域请求
crossButton.onclick = function () {
  axios({
     withCredentials: true, // ++
     method: "get",
     url: "http://localhost:3002/crossList",
   }).then((res) => {
     console.log(res);
   });
 };

2. 在服务端设置Access-Control-Allow-Origin
在app2.js中加入
app.all("*", (req, res, next) => {
   res.header("Access-Control-Allow-Origin", "http://localhost:3001");  // ++
   next();
});

3. 在服务端设置Access-Control-Allow-Credentials
在app2.js中加入
app.all("*", (req, res, next) => {
   res.header("Access-Control-Allow-Origin", "http://localhost:3001");
   res.header("Access-Control-Allow-Credentials", "true"); // ++
   next();
});

到此,我看可以看到跨域请求中加上了cookie。
4. 总结
1.前端请求时在request对象中配置"withCredentials": true;
2.跨域服务端在response的header中配置"Access-Control-Allow-Origin", “http://xxx:${port}”;
3.跨域服务端在response的header中配置"Access-Control-Allow-Credentials", “true”
5. 知识点
1.withCredentials
该XMLHttpRequest.withCredentials属性是一个布尔值,指示是否Access-Control应使用 cookie、授权标头或 TLS 客户端证书等凭据进行跨站点请求。设置withCredentials对同站点请求没有影响。
此外,此标志还用于指示何时在响应中忽略 cookie。默认值为false. XMLHttpRequest来自不同域的 cookie 不能为自己的域设置 cookie 值,除非在发出请求之前withCredentials设置为。true通过设置为 true 获得的第三方 cookiewithCredentials仍将遵循同源策略,因此请求脚本无法通过document.cookie或从响应标头访问。 —来自MDN
2.Access-Control-Allow-Origin
指定了该响应的资源是否被允许与给定的origin共享
3.Access-Control-Allow-Credentials
当请求的凭证模式 ( ) 为Access-Control-Allow-Credentials时,响应标头告诉浏览器是否将响应暴露给前端 JavaScript 代码。 Request.credentialsinclude
当请求的凭据模式 ( Request.credentials) 为 时,如果值为include,浏览器只会将响应暴露给前端 JavaScript 代码。 Access-Control-Allow-Credentialstrue
凭据是 cookie、授权标头或 TLS 客户端证书。
当用作对预检请求的响应的一部分时,这表明是否可以使用凭证发出实际请求。请注意,简单GET 的请求不会被预检。因此,如果对具有凭据的资源发出请求,并且如果此标头未与资源一起返回,则响应将被浏览器忽略并且不会返回到 Web 内容。
Access-Control-Allow-Credentials头与 XMLHttpRequest.withCredentials属性或 Fetch API 构造函数中的credentials选项一起使用。Request()对于带有凭据的 CORS 请求,为了让浏览器向前端 JavaScript 代码公开响应,服务器(使用 Access-Control-Allow-Credentials标头)和客户端(通过为 XHR、Fetch 或 Ajax 请求设置凭据模式)都必须表明它们’正在选择包括凭据。 —来自MDN
到此这篇关于详解javascript如何在跨域请求中携带cookie的文章就介绍到这了,更多相关javascript跨域携带cookie内容请搜索阿兔在线工具以前的文章或继续浏览下面的相关文章希望大家以后多多支持阿兔在线工具!


